How-To with Classic Truck Performance | 67-72 Chevy Truck Build-A-Bed

How-To with Classic Truck Performance | 67-72 Chevy Truck Build-A-Bed

How-To with Classic Truck Performance | 67-72 Chevy Truck Build-A-Bed

Of all the diverse elements that make up the automotive hobby the classic trucks we know and love continue to grow in popularity, and some of the most sought after are 1967-1972 Chevrolet C10s.

Like most things for which we trade our hard-earned money, supply and demand dictate the going rate for a vintage shortbed C10, and they aren’t getting more plentiful or cheaper. Back in the July ’24 issue of Classic Truck Performance magazine, editor Rob Fortier addressed that very subject and pointed out that far more longbeds were produced than shortbeds. Never one to shy away from controversy, Rob then addressed those who object to the transformation from longbed to shortbed; in short, his advice was get used to it because it’s going to keep happening. The fact is longbeds are often much more affordable than their more compact counterparts, so cutting one down to size makes sense.

To show the process of making a longbed into a shortbed, we documented the installation of the Classic Performance Products (CPP) frame shortening kit in the August issue of CTP. Designed with the do-it-yourselfer enthusiast in mind, CPP’s kit includes a pair of simple templates for drilling and cutting the frame and bobbing the back of the ’rails and laser-cut C-channel reinforcements that are bolted in place (welding is suggested for structural rigidity).

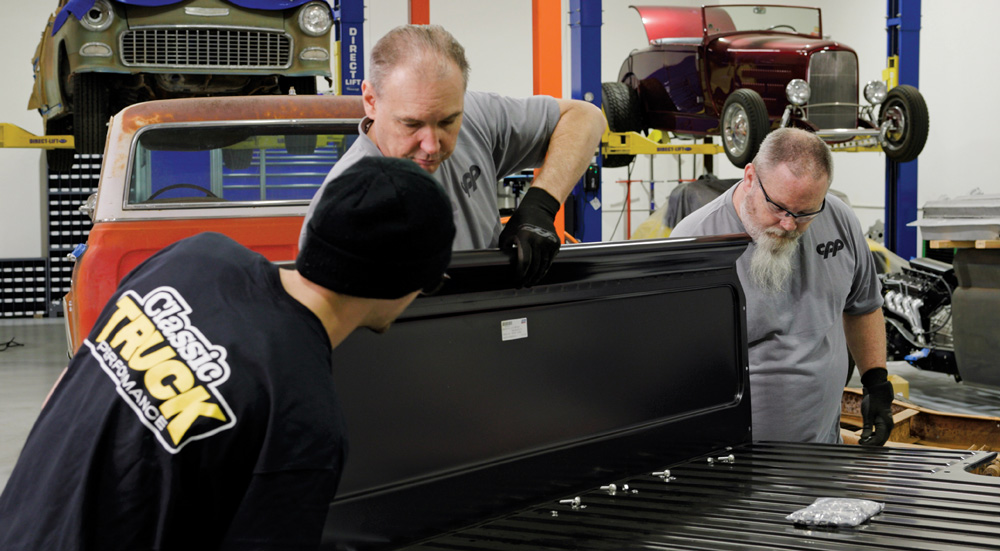
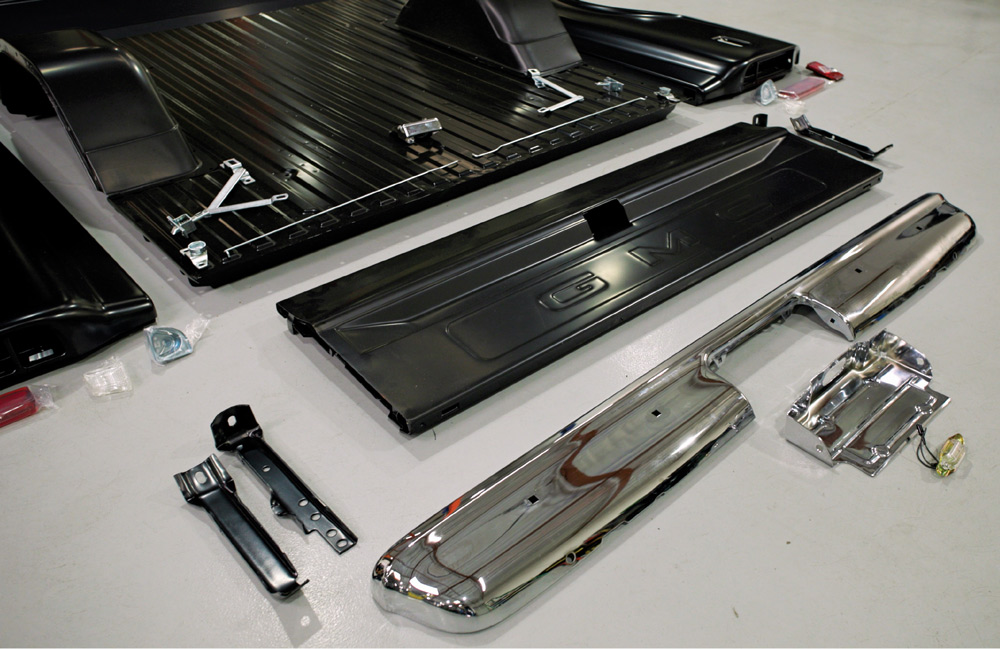
With the frame modifications completed, the CPP crew turned to Auto Metal Direct (AMD) for a new short Fleetside bed. While in our case the new bed was a replacement for a thrashed long version, keep in mind a new shortbed is often a better and more affordable choice than straightening and repairing a rough original.

At this point we should point out that contrary to popular belief, Fleetside 1967-1972 C10s may be found with metal or wood bed floors. Wood floors were available under RPO (regular production option) E81. In 1967 wood floors were painted black; for 1968-1972 the wood was painted body color.

For our application we chose a replacement bed with a metal floor (AMD offers metal and wood floors). Stamped from heavy-gauge steel, each bed floor assembly comes complete with cross sills, tail panel, and reinforcements already attached and there are provisions to directly bolt in factory-size wheeltubs. All the AMD sheetmetal is EDP coated to help protect against rust and corrosion prior to installation. For those going for the Pro Touring look, AMD offers bed floors and wheelhouses that are 4 inches wider to accommodate seriously fat rear rubber.

Assembling the new AMD bed is simple enough as it bolts together with no welding required. Interestingly, GM made the wheelhouses interchangeable so they will fit on either side. During assembly it’s important to leave all the fasteners loose as the last step in the installation is to align all the panels and square the bed. Once that is done all the fasteners can be tightened.

As the example shown here proves, transforming a 1967-1972 longbed C10 into a shortbed can be done quickly and easily with a frame kit from CPP and a new bed from AMD—supply and demand be damned.

Parts List
Auto Metal Direct 1967-1972 Chevy/GMC Shortbed Fleetside Sheetmetal:
parts list
well-used GMC longbed pickup
2. General Motors produced approximately three times as many longbed pickups as shortbeds from 1967-1972. While generally considered less desirable, the long wheelbase (LWB) versions are easier to find and usually more affordable.
Mechanic working on the rusted frame of a 1967-1972 GMC truck during restoration
3. Last month we showed how the team at CPP cut a typical 1967-1972 General Motors LWB pickup chassis down to short box size.
Aerial view of a 1967-1972 GMC truck with parts laid out for restoration in a workshop
4. With the frame shortened, the next step in the conversion was to assemble the new short Fleetside box from AMD.
Close-up of new truck bed parts laid out for a 1967-1972 GMC truck restoration project
5. For this application we chose a stock-dimension bed floor and wheelhouses; components to accept 4-inch-wider wheels and tires are available.
Team installing a new black tailgate on a 1967-1972 GMC truck during the restoration process
6. The first step in assembling the bed is to attach the front panel to the bed floor.
Mechanic aligning new bed panels on a 1967-1972 GMC truck during restoration
7. It is much easier to do this process with a friend as installation is much easier if you can install the front and rear of the bedside at the same time.
Close-up of a worker aligning and securing a new bed panel on a 1967-1972 GMC truck
8. When attaching the bedsides to the front panel leave the bolts slightly loose to allow adjustments later.
Mechanic carefully installing a bed side panel on a 1967-1972 GMC truck during restoration
9. With both bedsides in place check the fitment with the front bed panel to ensure everything lines up correctly.
Overhead view of a team assembling the bed of a 1967-1972 GMC truck in a workshop
10. During installation the rear of the bedside needs to align with the rear bed floor crossmember. The wheeltubs are then installed using the AMD installation hardware.
Team lifting and preparing to install a new tailgate on a 1967-1972 GMC truck
11. We elected to assemble the bed off the frame for easier access to all the fasteners.
Aerial view of the bed installation on a 1967-1972 GMC truck, showing a contrast between the new bed and rusty cab
12. With the bed sitting on the frame a punch can be used to align the mounting holes in the bed floor with the attachment points on the framerails.
Workers aligning a 1967-1972 GMC truck during restoration, preparing for bed installation
13. At this point it was time to ensure the bedsides are properly aligned with the cab and frame. Two sets of eyeballs and cross measuring from corner to corner will determine if any adjustments are necessary.
Assembling and securing bolts on the newly installed bed floor of a 1967-1972 GMC truck
14. Satisfied with the fit and alignment, all the AMD fasteners are tightened. The bed-to-frame hardware uses original-style carriage bolts.
Mechanic tightening bolts inside the freshly installed bed of a 1967-1972 GMC truck
15. Use care when installing all fasteners as overtightening can cause imperfections in the bed floor and bedsides.
Technician working on the underside of a 1967-1972 GMC truck, ensuring structural integrity
16. Part of the frame shortening process was removing the front mounts for the longbed. For original shortbed applications no modifications are necessary.
New chrome bumper and bed components laid out for a 1967-1972 GMC truck restoration
17. New tailgates are available plain, with Chevrolet or GMC lettering, as desired.
Mechanic installing hardware on a tailgate for a 1967-1972 GMC truck restoration
18. AMD also supplied the new tailgate latches and release hardware.
Workers tightening bolts on the bed corner of a 1967-1972 GMC truck
19. With the hinges and latch brackets attached to the bedsides, the tailgate is installed and the latch mechanism is installed.
Aligning the newly installed tailgate on a 1967-1972 GMC truck during restoration
20. With the tailgate in place the latch brackets on the bedsides can be adjusted to align the tailgate with the bedsides.
Adjusting the tailgate fitment on a 1967-1972 GMC truck during restoration
21. New taillight housings and the bumper brackets are more replacement products from AMD.
Two mechanics fine-tuning the installation of a chrome rear bumper on a 1967-1972 GMC truck
22. To add a little bling we opted for a new AMD chrome bumper—they also supplied the new taillight lenses and side marker lights.
Side view of a partially restored 1967-1972 GMC truck with a newly installed black bed
23. The finished transformation from longbed to shortbed.
Here is a link to the Classic Performance Products